Using Provider Rapid Charting
The EMR Glossary explains a number of EMR specific terms.
Summary
Rapid Charts allow you to create highly automated EMR Charting Templates by aggregating a number of Template Wizards to be run as a group. Multiple Rapid Charts can be associated with a single Template. A simple Rapid Chart might be used where the purpose is to produce a complete chart schematic of a simple condition. A Rapid Chart like this might be comprised of elements which are all predefined text, with no additional entry required. Others could be more complex, running a full sequence of questions, with detailed answers and decision making. The advantage of working with a Rapid Chart instead of the full Charting Template is that for simple conditions, running a Rapid Chart can be much faster than the process of clicking through the tabs to individually address each step. If you take your time to carefully think through and set up effective Rapid Charts, you can bring a high degree of automation to the charting process for certain types of visit. In general, Rapid Charts are going to work best for relatively straightforward complaints which present relatively little variety.
There are two types of Rapid Charts:
-
Single Tab Sets: You can create Rapid Charts which include only Wizards from a specific tab in Charting. The tabs for which Rapid Charts can be created are HPI, PMH, ROS, EXAM, and ORDERS. Exam Set Rapid Charts can also include Wizards from the RESULTS tab, and Order Set Rapid Charts can also include Wizards from the INSTRUCTIONS tab.
-
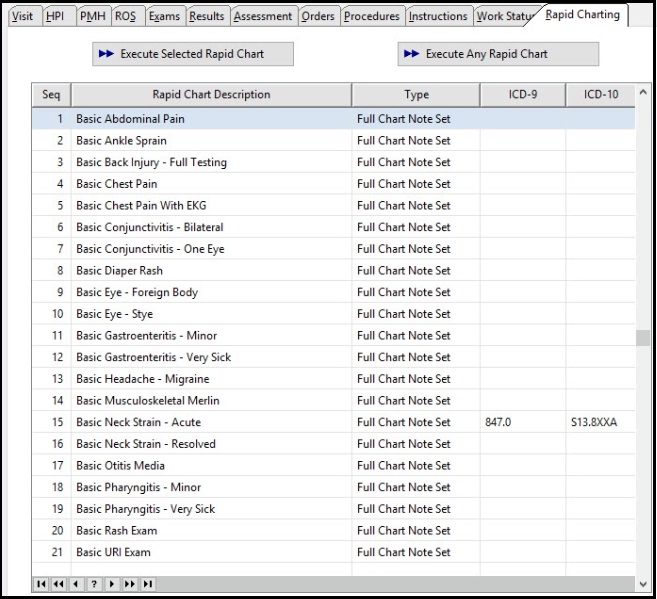
Full Charting Note Set: This supports complete documentation of fairly standard problems. It can include any type of Wizard as well as medications. This is useful for situations when you always chart the same thing, and the outcome of the exam is expected. An ICD-9 code can be associated with one of these Rapid Charts, to be automatically added to the visit when the Rapid Chart is run.
Running Rapid Charts
When working with an Charting Template on a visit, there are several ways to run Rapid Charts:
-
On most tabs, there is a "... Set" button for that tab, and clicking it displays all Rapid Charts specific to the tab. For instance, if you click the Exam Set button on the EXAM tab, you can select a Rapid Chart to run from a list of all Exam Set Rapid Charts. A similar button functions in the same way on each of the other tabs which can have associated Rapid Charts.
-
The Rapid Chart tab displays a list of Rapid Charts associated with this Template. You can Rapid Charts on this list one at a time by highlighting one and clicking the Execute Selected Rapid Chart button.
-
Also on the Rapid Chart tab is the Execute Any Rapid Chart button which lets you run any Rapid Chart that has been created. Clicking it will display the [Select EMR Rapid Chart] window. Search for and select the Rapid Chart you want to run.
Once you select the Rapid Chart to run, it will execute all Wizards associated with it, one by one.
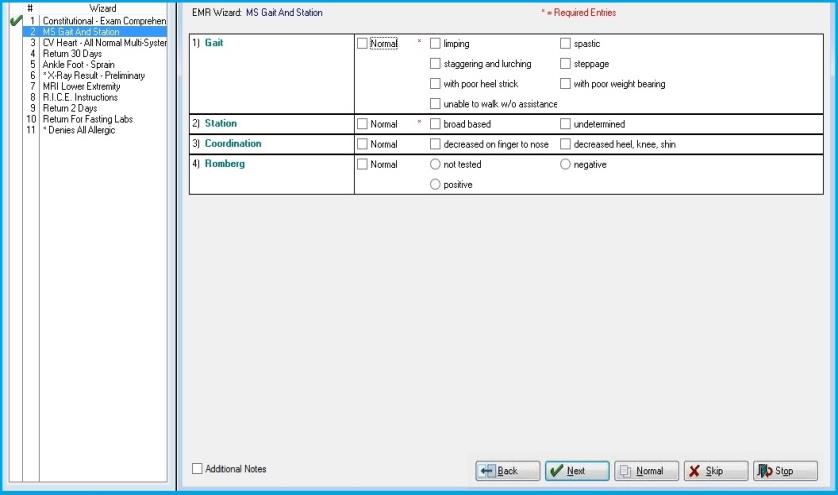
The specific Wizards the make up the Rapid Chart are listed to the left.
Was the Rapid Chart begins, the buttons on the bottom right are used to control the function.
Back: Will return the user to the previous wizard and reprocess it.
Next : Will proceed to the next Wizard in the sequence.
Normal: Will mark the Wizard step as "Normal" and populate the Charting note with the correct statement.
Skip: Will skip the highlighted Wizard.
Stop: Will stop the Rapid Chart, populate the Charting Note. It is important to note that the wizard that Net Health Employee Health and Occupational Medicine is processing at the time the user selects stop IS NOT included as part of the exam and will not show on the Charting Note.
Read the topic on setting up Rapid Charts to learn about creating and modifying them.